


Qualtrics offers its users many powerful features, so many that it can be hard to keep track of them.
We’d like to highlight a couple of these useful tools for customizing your MSU Qualtrics survey using the “Look and Feel” menu and the an authenticator to limit access to your survey.
MSU Qualtrics background
MSU has a Qualtrics enterprise license, so student, faculty, and staff can log in at qualtrics.msu.edu with their MSU NetID and password to use this powerful survey tool at no cost.
Check out MSU Qualtrics: Getting Started for additional tips.
Tip 1: Choosing a survey theme
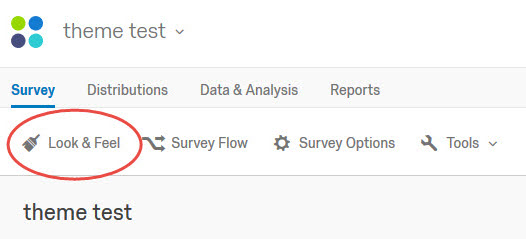
Once logged into MSU Qualtrics, the “Look and Feel” Qualtrics menu allows you to change the theme you use, as well as customize specific items within your survey.
The default theme is MSU-branded, and generally that will be best to use.
In some situations, research and surveys may require a more general look and feel not associated with MSU. To change the theme for your survey, select the “Look and Feel” menu and then choose the “Change Theme” option. Qualtrics has created multiple template themes for use.
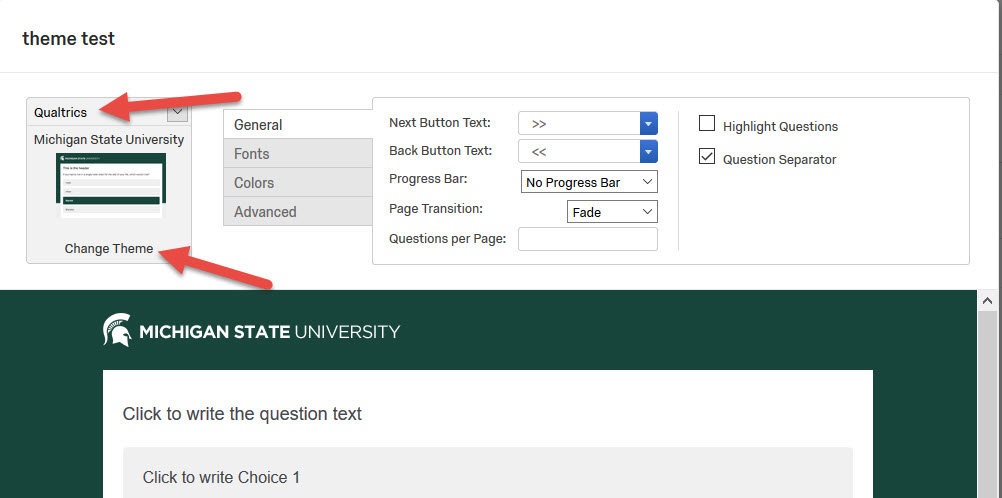
Below, you see the MSU default theme, and the “Change Theme” section.
- Using the down arrow under the default theme, select “Qualtrics.”
- Then click “Change Theme” to see the general Qualtrics themes.
- Click on the thumbnail to preview the options.
Tip 2: Customizing items within a survey theme
In addition to choosing a new theme, you can customize items within the theme for your survey. This is helpful even if using the default MSU theme.
In the “Look and Feel” menu, you can choose “General,” “Fonts,” “Colors,” or “Advanced,” and each of those selections provide other choices for customization.
Quick guide to “Look and Feel” sub-menu items:
- The “General” menu allows you to customize “Next” and “Back” button text among other options.
- The “Fonts” menu allows you change the font for entire survey or just the questions or responses.
- “Colors” allows you choose color for text types in your survey, in addition to background colors. (Make sure to use enough color contrast for accessibility.)
- “Advanced” gives you the ability to add a header or footer (including graphics) or customized cascading style sheets (CSS).
NOTE: Under “Advanced,” we recommend you edit the header of any survey with title of your survey and your unit, college, or project to create context for survey takers.

Be aware that changes made in the Look and Feel menu apply to the whole survey. However, if you’ve changed something (font size, colors, etc.) in the Rich Text Editor of an individual question, those changes override any “Look and Feel” menu changes.
Creating accessible surveys
You’ll want to make sure the survey you create works with MSU accessibility standards. For example, color contrast is important and should be evaluated when changing text colors. Some question types, such as heat maps and matrix questions, are not accessible.
Accessibility resources:
- Accessibility Guidance for MSU Survey Creators
- Qualtrics: Accessible Question Types
- Qualtrics Survey Accessibility Tool
- MSU Accessibility Policy
If you need help creating an accessible web survey, you can also contact webaccess@msu.edu.
Tip 3: Using an Authenticator to control survey access
Another great Qualtrics feature is the ability to use an authenticator with your survey. An authenticator is exactly what it sounds like – something that authenticates whether a survey respondent is allowed to access your survey.
Authenticators create a login page within your survey and compare the respondent’s email to a Qualtrics contact list or a single-sign on (SSO) system. Some of the SSO systems include Google OAuth 2.0, Facebook, and Shibboleth. MSU uses Shibboleth to authenticate into various MSU systems, and selecting this option will allow people to log in with their MSU NetID. Their MSU password is not required.
NOTE: Some of the authenticator types require some advanced knowledge of SSO systems.
To add an authenticator to your survey:
- Go to your “Survey Flow” and add an element.
- Choose “Authenticator” as your element type.
- Select the authenticator of your choice, adding the required data.
- After you have set the authenticator up, move the element to be the first item in your survey flow and move all other survey elements under it.
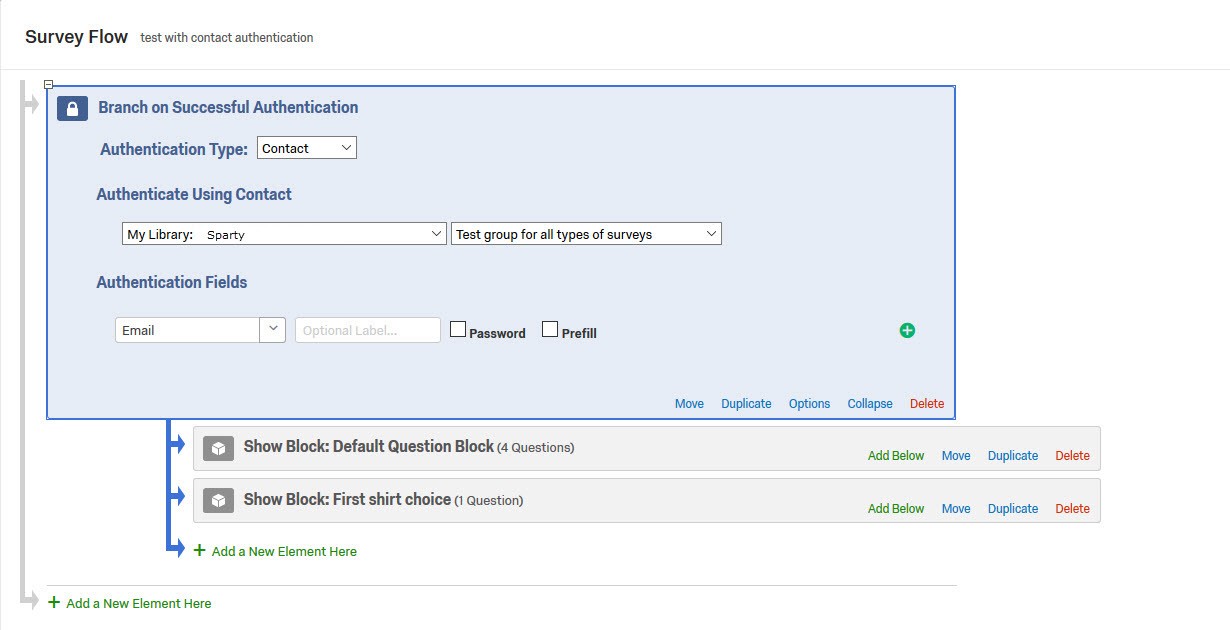
If other survey elements are not nested underneath the authenticator (see image above), respondents will be able to access the questions in those elements without having to authenticate.
Additional information can be found at the Qualtrics Authenticator Overview web page.